Check out the Services page to see my pricing or book me!
The Laneige Project
After an initial, dissatisfying attempt at capturing Laneige's lip sleeping mask product, it's time for an equipment upgrade >:)
MY CREATIVE PROCESS
Leiada Krözjhen
3/17/20252 min read
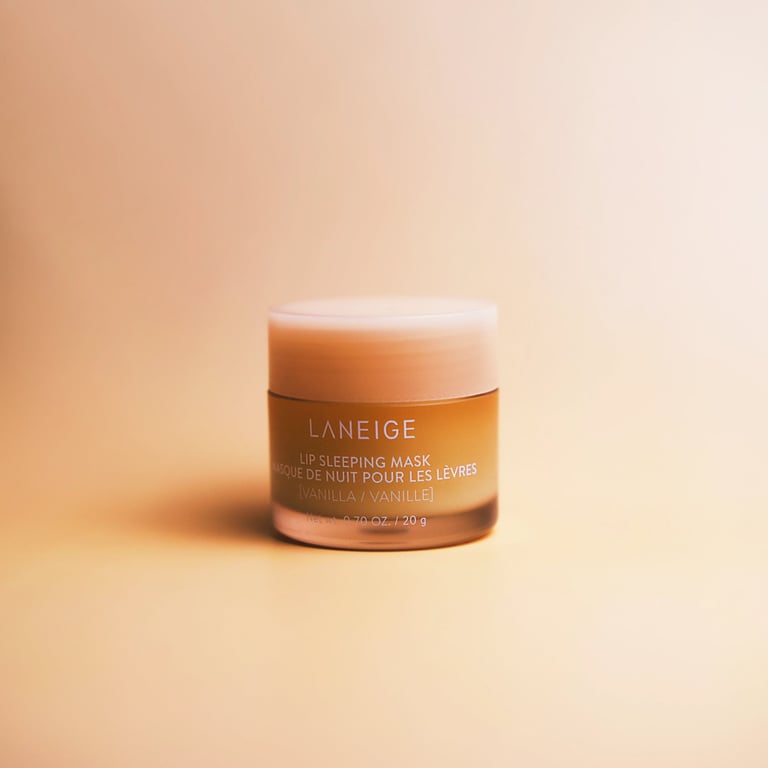
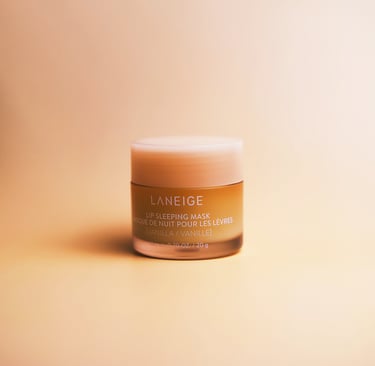
I was never going to share the image you're seeing right now. It's bland, painfully boring to look at, and I'm not proud of it. Especially considering I had shot significantly better photos of products such as Florence's face wash and a Bleu De Chanel perfume bottle.
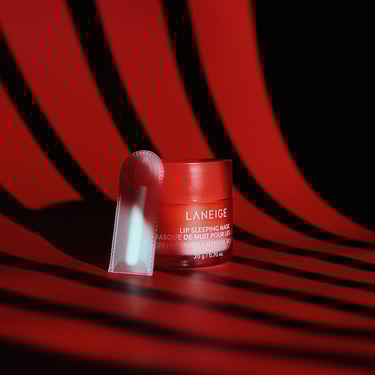
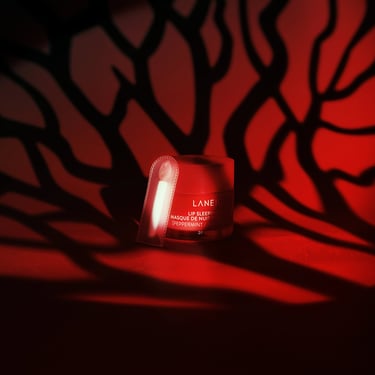
Retreating to my portfolio for inspiration, I returned to the lip mask product with reluctant realization: my product photos need shadows. More specifically, I've needed gobos and a strobe light for a long time to take my product photos to the next level.
When I needed a softbox light, I refused to pay for one and created my own out of a Hammermill cardboard box, parchment paper, aluminum foil, and an LED work light. When I needed foam boards and white/black backdrops, I visited Michael's where I could get them for less than $20. When I needed a window blind gobo, I waited for the afternoon time to hopefully come around with clear, sunny skies, regularly moving my set to match the sun's setting position.
But now? After some serious deliberation, I don't want to see the same old shadows and same plain lighting. I also dislike struggling with the "striped" or "banded" shadows that would appear on my camera viewfinder due to my reliance on continuous lighting. Additionally, while I'm in love with my props, I also don't want to overrely on them just to make a scene feel...alive.
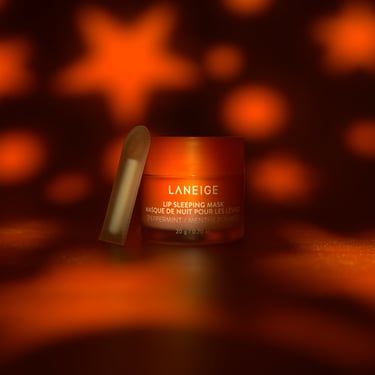
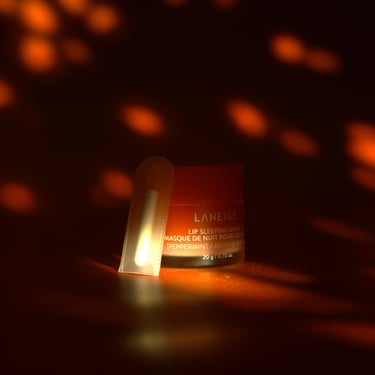
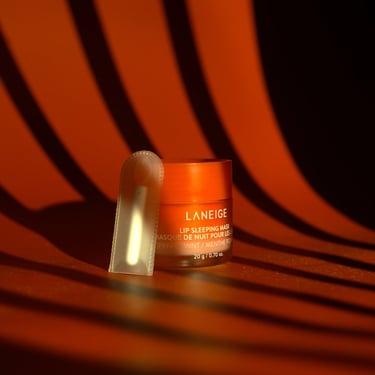
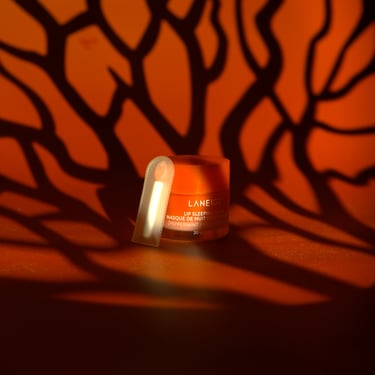
So, with all of that said, after months of delay and denial, I decided it was time for me to invest in a strobe light and a mount (including gobos) for said light. With weeks of research, I purchased a Godox SK400II-V Studio Flash Monolight and a Bowens Mount Snoot Spotlight GOBO Projector.
After both were delivered, I set to work with the Laneige product, but this time, decided to entertain shooting a different lip mask from them. With its vibrant red color, I went from shooting the vanilla-scented product to the peppermint. Considering my portfolio is EXTREMELY lacking in the color "red", it was about time I tried my hand at working with it.
After seeing the usefulness of using "D-LOG M" on the DJI Osmo Pocket 3, I changed my FujiFilm XT-4 film simulation settings from Velvia/Vivid to Provia/Standard. Rather than getting rich reds in my RAWs, the files now took on a more desaturated, less vibrant appearance, a decision I would come to appreciate as it made the color grading process smoother.
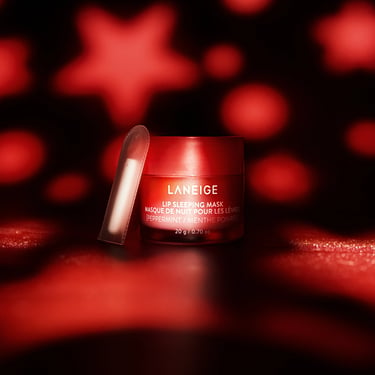
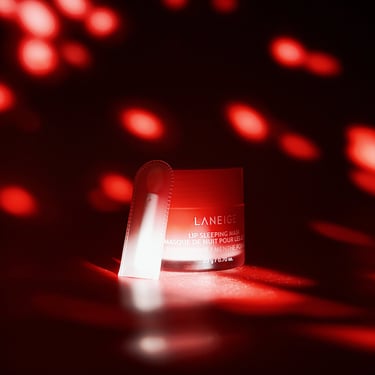
Excited to try out my different gobos for different looks, I went with four different variations for the product, before moving on to the editing process. There, while I initially aimed for my crisp, sharp, and clear editing style that the majority of my photography works share, I accidentally increased the Clarity on the first photo I edited.
Usually, I don't favor the film grain/film noise look as I feel it degrades the quality of my photos. However, on closer inspection, why not allow it this time? It gave the photos a genuinely vintage, dreamy appeal; think, "Highway to Heaven" aesthetic where lights feel more glowy and dreamy. So, I opted to keep in the film noise and bloom effects for all remaining photos too.
Overall, I was very proud of what was accomplished with it and I'm glad I went for a round two on the Laneige lip sleeping mask product. Can't wait to shoot more like it soon and hope you lovelies enjoy the ride while I'm at it!